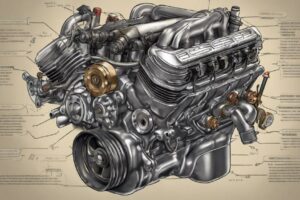
If dealing with a P0522 code for low engine oil pressure, start by checking oil levels using the dipstick. Confirm levels are within the recommended range to prevent damage. Test pressure switches individually for accurate diagnostics using a pressure gauge. Inspect wiring for damage, test for continuity, and address any issues promptly. Consider replacing faulty sensors with GM part 12585328 for compatibility, following a sensor replacement guide carefully. Maintain regular oil pressure monitoring and act promptly on warnings. Following manufacturer recommendations for oil type and viscosity is essential. Proper maintenance and swift action are key to resolving low oil pressure sensor issues effectively.
Key Takeaways
- Check oil levels with dipstick on level surface when cool.
- Test pressure switches individually for accurate diagnostics.
- Verify wiring integrity for sensor functionality.
- Replace faulty sensors with recommended GM part.
- Maintain oil pressure levels for engine health.
Checking Oil Levels

To guarantee proper maintenance, regularly check your oil levels using the dipstick when the engine is cool and on a level surface. Confirm the oil level falls within the recommended range indicated on the dipstick for accurate readings. Monitoring oil levels is vital for preventing engine damage due to insufficient lubrication. Low oil levels can lead to low oil pressure issues, triggering the P0522 trouble code. Maintaining the right oil level is essential for the overall health and performance of your engine.
When checking your oil levels, also assess the quality of the oil. Look for any signs of contamination or discoloration that may indicate the need for an oil change. Proper oil quality assessment can help in detecting early signs of engine wear. Moreover, consider the impact of temperature on your oil. Extreme temperatures can affect the viscosity of the oil, influencing how well it lubricates the engine. Based on these factors, determine the frequency at which you should change your oil to ensure peak engine performance and longevity.
Testing Pressure Switches
When evaluating the functionality of pressure switches in your vehicle's engine system, make sure to conduct thorough testing to pinpoint any potential issues accurately. Pressure switch diagnostics are essential in identifying problems within the engine oil pressure system. Begin by testing each switch individually using sensor troubleshooting techniques.
Manual pressure gauge readings showing zero pressure on front oil pressure switches indicate a possible malfunction. In contrast, testing the third switch near the oil filter that yielded readings within specified limits suggests proper functionality. Record oil pressure at idle as 15psi and over 3000 rpm as 80 psi for analysis.
Lack of voltage on the red wire of the pressure switch may indicate a wiring issue, which can be confirmed by checking the integrity of the fuse labeled 'Oil Level' (7.5A) during troubleshooting. By following these steps, you can efficiently diagnose and address any pressure switch issues affecting your engine's oil pressure system.
Verifying Wiring Integrity

Inspect for any visible signs of damage or wear on the wiring connected to the oil pressure sensor to guarantee proper functioning of the system. Start by checking the insulation for any cracks, cuts, or exposed wires that could lead to electrical issues.
Using a multimeter, test the continuity of the wiring to make sure there are no breaks or shorts that might disrupt the sensor's readings. Furthermore, examine the wiring harness for any loose connections or corrosion that could affect the sensor's performance.
Look closely for any signs of rodent damage or chewing on the wiring, as this could create potential problems. Make sure the wiring is securely connected to the sensor and there are no frayed or exposed wires that could cause a short circuit.
If you identify any issues during the inspection, repair connections promptly to maintain proper functionality of the oil pressure sensor. Regularly checking the wiring integrity can help prevent future sensor malfunctions.
Replacing Faulty Sensors
Facilitate a smooth replacement process by utilizing the GM part 12585328 filter for the oil pressure sensor. When addressing faulty sensors, guarantee sensor compatibility by using the recommended filter.
Craft an extraction tool to carefully remove the old filter and follow a sensor replacement guide for step-by-step instructions. Pay close attention to the installation technique to ensure the new filter is securely placed in its designated location.
DIY replacement is a cost-effective solution that helps prevent misdiagnosis and maintains accurate oil pressure readings. By adhering to the correct sensor compatibility and installation procedures, you can effectively replace faulty sensors without incurring unnecessary expenses.
Remember that using the appropriate tools and following the recommended steps will guarantee a successful sensor replacement, allowing you to resolve the P0522 code related to low engine oil pressure sensor issues accurately.
Maintenance and Prompt Action

Regularly monitoring your oil pressure levels is crucial for maintaining engine health and performance. To guarantee your vehicle runs smoothly and efficiently, follow these maintenance tips and take prompt action when needed:
- Quickly address any low oil pressure warnings to prevent potential engine damage.
- Follow manufacturer recommendations for oil type and viscosity to maintain proper lubrication.
- Conduct scheduled maintenance for sensor inspection to detect any issues early on.
- Promptly replace any faulty oil pressure sensors to prevent further complications.
As an Amazon Associate we earn from qualifying purchases.


