


To replace your vehicle’s CV axle, gather essential tools like a 22mm socket, torque wrench, and pliers. Elevate your vehicle safely, inspect the axle, and secure necessary tools.
Loosen the axle nut with a 36mm socket, disconnect the ball joint, and carefully remove the CV axle. Guarantee proper alignment and lubrication when installing the new CV axle, following torque specs closely.
Reassemble brake components securely, hand-tightening lug nuts before final torque. Test the new CV axle by examining splines, boot integrity, and movement smoothness. Confirm proper fitment and function.
Further insights await on top-notch performance.
Key Points
- Properly secure vehicle and gather tools for safe and efficient axle replacement.
- Carefully remove old CV axle, ensuring proper disconnection of components.
- Install new axle correctly with alignment, lubrication, and torque specifications in mind.
- Reassemble wheel and brake components meticulously, following proper tightening procedures.
- Thoroughly test new CV axle for fitment, integrity, and functionality before completing the replacement.
Tools Needed for CV Axle Replacement
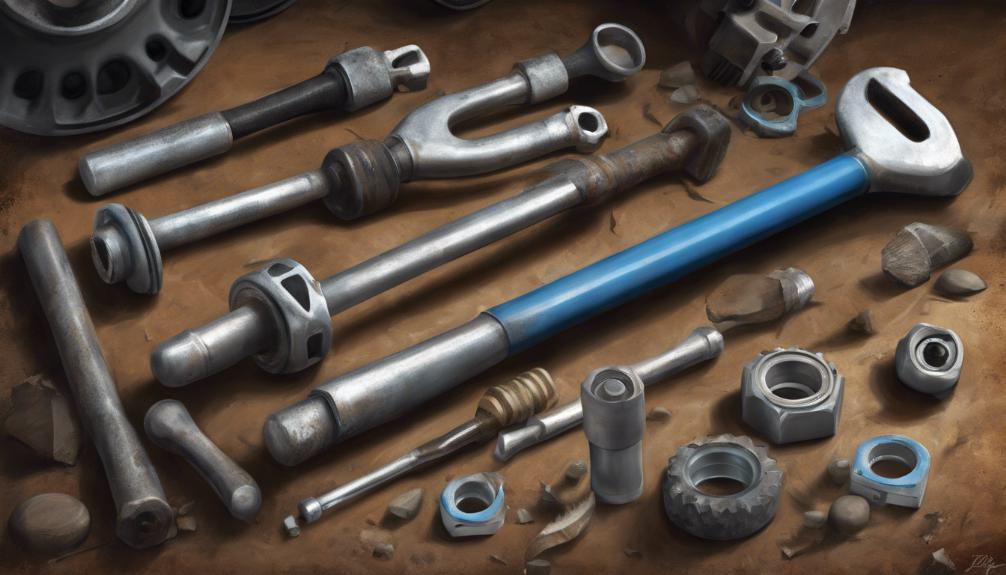
You’ll need a set of tools to successfully replace a CV axle. For this job, make sure you have a 22mm and 36mm socket on hand to tackle the various nuts and bolts involved.
Then, a torque wrench that can handle up to 180 ftlbs is vital to guarantee proper tightening of the axle components.
When it comes to removing cotter pins, having a pair of needle nose pliers will come in handy for a smooth process.
To deal with stubborn axle nuts, consider using an impact wrench or a breaker bar to provide the necessary force for removal. These impact tools can make a significant difference in easing the disassembly process.
Preparing Your Vehicle for Axle Removal
Before commencing the axle removal process, make sure the vehicle is securely elevated and the wheels are properly blocked. Here are some essential steps to prepare your vehicle for axle removal:
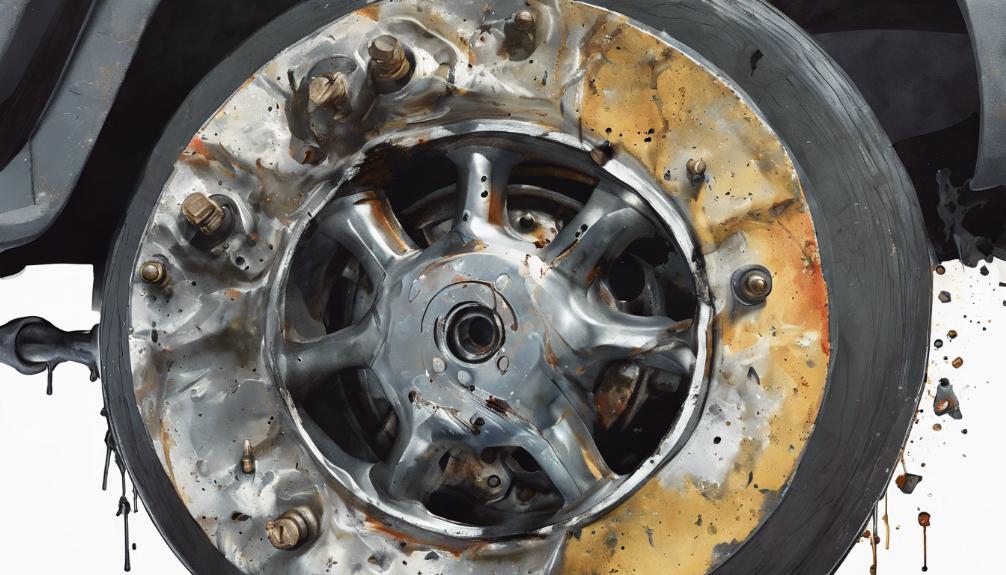
- Axle Inspection: Before starting the removal process, inspect the axle for any visible damage or signs of wear.
This will give you a better understanding of the axle’s condition and help you anticipate any potential challenges during the replacement.
- Safety Precautions: Prioritize safety by wearing appropriate protective gear, such as gloves and safety glasses, to prevent injuries.
Also, ensure the vehicle is on a stable surface, securely lifted, and the wheels are securely blocked to prevent any accidental movement.
- Securely Elevate the Vehicle: Use jack stands or ramps to elevate the vehicle to a comfortable working height.
This will provide you with better access to the axle and surrounding components, making the replacement process more manageable.
- Gather Necessary Tools: Collect all the tools required for the job, such as a lug wrench, socket set, and pry bar, before starting the axle removal.
This will streamline the process and prevent any delays during the replacement procedure.
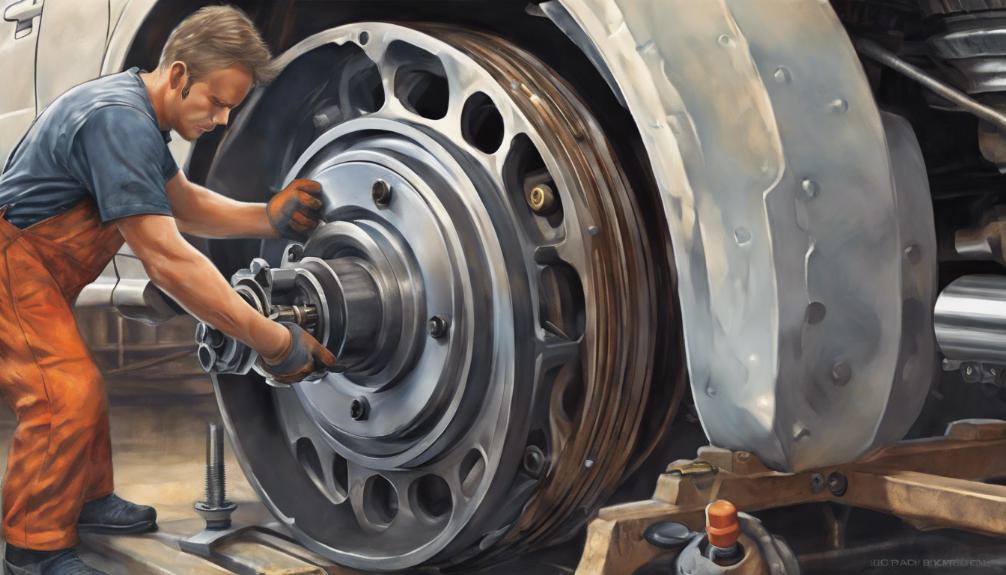
Removing the Old CV Axle
To remove the old CV axle, start by using a 36mm socket to loosen and remove the axle nut securing it in place.
Afterward, disconnect the ball joint from the lower control arm using pliers and a socket.
To extract the CV axle, carefully pull it out from the hub with a hammer or pry bar, ensuring a smooth removal process.
If needed, remove the half/intermediate shaft before separating the CV joint. It’s important to follow proper removal techniques to avoid damaging any components during this process.
Troubleshooting common axle removal issues may include dealing with stubborn or stuck axles, which may require additional force or the use of penetrating oil to loosen them.
Taking your time and being patient can help prevent unnecessary damage to surrounding parts.
Installing the New CV Axle
To guarantee a secure and proper fit of the new CV axle, make sure the splines are aligned correctly. Here are some key steps to follow during the installation process:
- Proper Alignment: Align the splines of the new CV axle with the corresponding splines in the transmission or differential housing. This alignment is essential for the axle to slide in smoothly and securely.
- Axle Lubrication: Before inserting the new CV axle, apply a thin layer of axle grease to the splines. This lubrication helps with the installation process and ensures that the axle moves freely without any binding.
- Complete Seating: Ensure that the CV axle is fully seated in the transmission or differential. A properly seated axle prevents leaks and potential damage to the components.
- Torque Specifications: Tighten the axle nut to the manufacturer’s specifications using a torque wrench. Proper torque is important for the safety and efficient functioning of the axle assembly.
How Does Understanding Caster Help with DIY CV Axle Replacement?
Understanding caster is crucial for DIY CV axle replacement because it directly impacts steering alignment dynamics. Caster affects stability and steering feel, making it essential for smooth handling. When replacing a CV axle, having a good grasp of caster will ensure proper steering functionality and overall vehicle performance.
Reassembling the Wheel and Brake Components
Reassemble the wheel and brake components by securely reinstalling the brake rotor and caliper to the manufacturer’s specifications.
Confirm the brake caliper is aligned correctly and fastened using bolts or pins to prevent any movement while driving. Double-check that the brake pads are properly seated within the caliper bracket for best braking performance.
Next, mount the wheel onto the hub and hand-tighten the lug nuts before lowering the vehicle for final tightening.
To secure the wheel correctly, use a torque wrench to tighten the lug nuts in a star pattern to the recommended torque setting.
This step is important to ensure the wheel is attached properly and to prevent any issues while driving.
Testing the New CV Axle
Inspect the new CV axle to confirm it matches the specifications of the old axle for proper fitment. To guarantee a successful replacement, follow these steps:
- Axle Compatibility: Compare the new CV axle to the old one, checking dimensions, spline count, and overall design to guarantee a perfect match.
- Inspection Process: Examine the splines on the new CV axle thoroughly. They should be undamaged, ensuring a secure connection to the transmission.
- Boot Integrity: Verify that the CV axle boots are in good condition and securely attached. Intact boots prevent contamination and premature wear of internal components.
- Smooth Movement: Rotate the CV axle by hand to test for smooth movement and proper articulation. Any unusual resistance or noise could indicate a problem that needs addressing before installation.
As an Amazon Associate we earn from qualifying purchases.