


The alternator in your car or truck is responsible for charging the battery and providing power to other electrical systems while the engine is running. If the alternator starts to malfunction, it can cause problems with the engine and electrical components when you are driving.
One common question that arises is whether a faulty alternator can trigger the check engine light and the answer is yes, a bad alternator can cause the check engine light to come on.
When the alternator is unable to supply adequate power to the vehicle’s electrical systems, the ECU may detect this as an issue and turn on the check engine light, sometimes storing diagnostic trouble code P0562, which indicates low system voltage.
Apart from the check engine light, there are other symptoms that can indicate a bad alternator. These may include dimming headlights, flickering dash lights, poor battery performance, and even stalling of the engine.
Can a Bad Alternator Cause a Check Engine Light?
A bad alternator can cause a check engine light to come on because the alternator is an integral part of the vehicle’s electrical system. The alternator is responsible for charging the battery and providing power to other electrical systems while the engine is running.
If the alternator starts to malfunction and is unable to supply adequate power to the vehicle’s electrical systems, the engine control unit (ECU) may detect this as an issue and turn on the check engine light.
If the alternator is failing, it can cause various issues with the electrical system that may lead to the check engine light being triggered.
Here are some examples of how a bad alternator can impact other systems in the vehicle:
- Battery: Since the alternator charges the battery, a failing alternator can result in a dead battery, causing the check engine light to turn on.
- Voltage regulator: The voltage regulator, which is sometimes external to the alternator, can also cause the check engine light to illuminate if it is faulty, as it is responsible for controlling the alternator’s output. If the alternator is overcharging or undercharging, it may be a result of a faulty voltage regulator.
- Sensors and electronics: The electrical system of a vehicle relies on the alternator to provide the necessary power. A failing alternator may lead to poor performance in various sensors and electronic components, which could trigger the check engine light.
What Are Other Causes of A Check Engine Light?
The check engine light is a warning light on the dashboard of your car that indicates that there is a problem with one or more of the vehicle’s systems. When the check engine light turns on, it means that the ECU has detected an issue that could affect the performance or emissions of the vehicle.
Some common reasons for the check engine light to turn on include:
- Faulty oxygen sensor: The oxygen sensor measures the amount of oxygen in the exhaust and sends this information to the ECU. A faulty oxygen sensor can cause the engine to run rich or lean, leading to poor fuel economy and increased emissions.
- Loose or damaged gas cap: The gas cap seals the fuel system and helps maintain proper pressure. A loose or damaged gas cap can cause the check engine light to turn on and can also lead to fuel evaporation and decreased fuel economy.
- Malfunctioning catalytic converter: The catalytic converter reduces harmful emissions by converting pollutants into less harmful gases. A malfunctioning or blocked catalytic converter can cause the check engine light to turn on and can also lead to increased emissions and decreased fuel economy.
- Failing spark plugs or ignition coils: The spark plugs and ignition coils work together to ignite the fuel in the engine. Failing spark plugs or ignition coils can cause the engine to misfire, leading to decreased performance and increased emissions.
- Issues with the mass airflow sensor: The mass airflow sensor measures the amount of air entering the engine and sends this information to the ECU. Issues with the mass airflow sensor can cause the engine to run rich or lean, leading to poor fuel economy and increased emissions.
- Problems with the fuel injectors or fuel system: The fuel injectors deliver fuel to the engine, and problems with the fuel injectors or fuel system can cause the engine to run poorly, leading to decreased performance and increased emissions.
- Malfunctioning engine coolant temperature sensor: The engine coolant temperature sensor measures the temperature of the engine coolant and sends this information to the ECU. A faulty engine coolant temperature sensor can cause the engine to run rich or lean, leading to poor fuel economy and increased emissions.
- Issues with the exhaust gas recirculation (EGR) valve: The EGR valve recirculates exhaust gases back into the engine to reduce emissions. Issues with the EGR valve can cause the engine to run poorly, leading to decreased performance and increased emissions.
The check engine light can also come on if there is damage to the engine that causes overheating or misfires. This can be caused by low coolant or even low engine oil.
In some cases, the symptoms of a bad alternator can be mistaken for other issues, such as a dead battery or failing sensors.
For example, dimming headlights or flickering dashboard lights can be caused by both an alternator and battery issue.
Similarly, a sensor failure can cause the ECU to misinterpret the data and generate error codes related to the alternator, even if the alternator is functioning correctly.
If you don’t have the skiils yourself to accurately diagnose the cause of a check engine light, it is essential to have a professional mechanic perform a thorough inspection and utilize diagnostic tools to read the error codes and pinpoint the exact issue.
This is important because by addressing the root cause, you can avoid unnecessary repairs and expenses while ensuring your vehicle performs at its best.
How Does Voltage Regulation in an Alternator Affect the Check Engine Light?
Voltage regulation is crucial for the proper functioning of an alternator. Understanding wiring diagrams and voltage regulation helps ensure the right amount of power is sent to the battery and other electrical components. If the voltage regulation is off, it can trigger the check engine light, indicating a potential issue with the charging system.
What Are The Other Common Symptoms of Bad Alternator?
Along with a check engine light, a bad alternator will also manifest various symptoms that may affect a vehicle’s performance and safety.
Some common symptoms include:
| Symptom | Description |
|---|---|
| Dimming headlights | The headlights may appear dim or flicker while driving, especially at low speeds or when idling. |
| Flickering dash lights | The lights on the dashboard may flicker or dim, indicating a loss of power. |
| Poor battery performance | The battery may not hold a charge or may die frequently, even after being replaced. |
| Electrical issues | Other electrical systems in the vehicle, such as power windows or the radio, may not function properly or may cut out unexpectedly. |
| Strange noises | The alternator may make unusual noises, such as grinding or whining sounds. |
| Burning smell | A burning smell may be present, indicating that the alternator is overheating or failing. |
| Stalling engine | The engine may stall or hesitate while driving, especially at low speeds or when idling. |
How Can These Bad Alternator Symptoms Trigger The check engine light?
While a bad alternator will directly turn on the battery or alternator (charging) light in the dashboard, it can also cause the check engine light to turn on sometimes. This may happen due to the failing alternator affecting other vehicle components and sensors.
For example, a malfunctioning alternator might cause the electrical system to work inefficiently, leading to voltage fluctuations that affect sensors or the vehicle’s control module. In turn, this may throw error codes and trigger the check engine light.
Dimming headlights, flickering dash lights, and other electrical issues can also be detected by the ECU and cause the check engine light to turn on. The ECU is designed to monitor various systems in the vehicle and detect any issues that could affect its performance or emissions. When the ECU detects a problem with the electrical system, it may turn on the check engine light to alert the driver to the issue.
The lack of sufficient electrical current from the bad alternator might also lead to a weak battery, causing the vehicle to enter limp mode. In this state, the check engine light typically turns on to warn the driver of potential damage to the engine or other components.
So while bad alternator might not be a direct cause of the check engine light, a bad alternator can indirectly trigger the check engine light due to its impact on various vehicle systems and sensors.
What Next – How To Diagnose Alternator Problems
To diagnose a bad alternator, start by checking the battery to make sure it’s in good condition and fully charged. A bad battery can often be the cause of electrical problems if it can no longer accept a charge from the alternator.
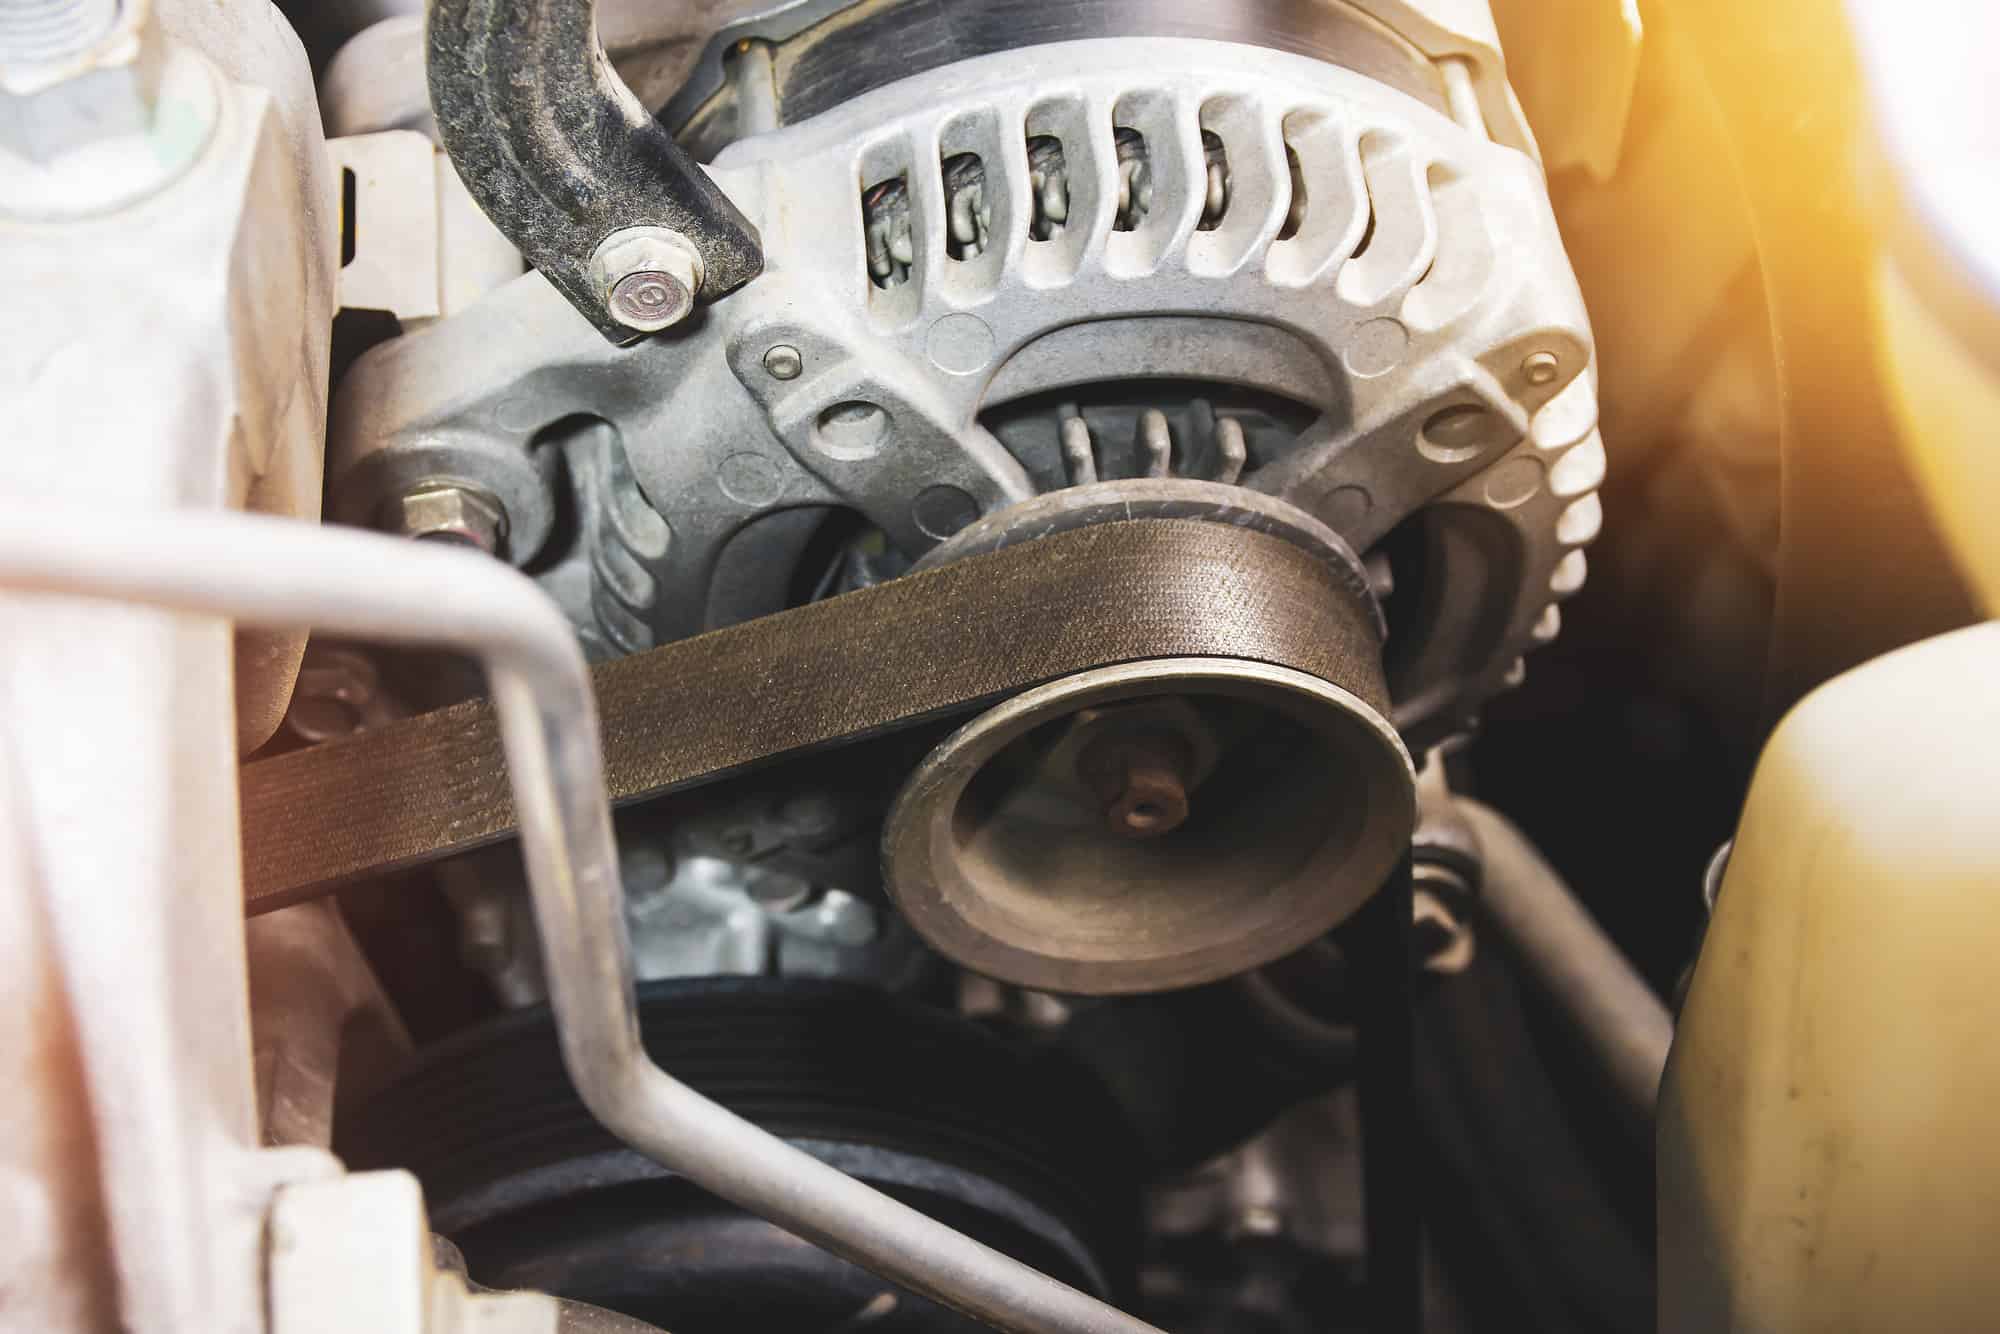
Next, check the alternator belt for signs of wear or damage and make sure it’s properly tensioned. You should also check the belt pulleys and tensioners for signs of damage or wear. If they are not rotating smoothly or if they are noisy then this can affect the operation of the alternator.
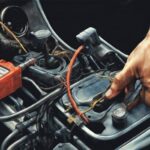
If the battery and auxiliary belt are in good working order then you’ll need to check the current coming from the alternator. If you aren’t familiar with this process then you should leave it to a qualified mechanic.
One of the primary methods for diagnosing alternator problems is to perform a voltage test. This involves checking the voltage produced by the alternator when the engine is running.
An alternator should generally produce around 13.5 to 14.5 volts, which can be measured using a digital multimeter or a dedicated voltmeter. If the voltage output is outside of this range, it may indicate a problem with the alternator or the vehicle’s charging system.
You can also connect the multimeter’s probes to the battery terminals with the engine running. This can confirm whether the issue lies within the alternator itself or in the charging system’s wiring.
If you think you have the necessary skills then it is also worth checking the alternator diodes.
Alternator diodes are electronic components that are used in the rectifier assembly of the alternator. The rectifier assembly is responsible for converting the AC voltage generated by the alternator into DC voltage that can be used by the vehicle’s electrical system.
The rectifier assembly typically contains six diodes, which are arranged in a specific pattern to ensure that the AC voltage is properly converted to DC voltage.
To test the alternator diodes, you will need a multimeter and preferably a socket wrench set. Here are the steps to follow:
- Remove the negative battery terminal: Before testing the diodes, it’s important to disconnect the battery to prevent any electrical shocks or damage to the vehicle’s electrical system.
- Locate the alternator: The alternator is typically located near the engine and is driven by a belt. It will have wires and electrical connectors attached to it.
- Remove the alternator cover: Depending on the make and model of your vehicle, you may need to remove the alternator cover to access the diodes. Consult your vehicle’s owner’s manual for specific instructions.
- Test the diodes: Using a multimeter set to the diode test setting, test each of the six diodes in the rectifier assembly. The multimeter should indicate a voltage drop of around 0.5 volts for each diode. If the voltage drop is significantly higher or lower, the diode may be faulty and will need to be replaced.
- Reassemble the alternator: Once you have tested the diodes, reassemble the alternator and reconnect the battery.
It’s important to note that testing the alternator diodes can be tricky, and it’s often best to leave this type of testing to a qualified mechanic.
To summarize, here’s a checklist of the steps you could take to diagnose issues with an alternator:
| Step | Checklist |
|---|---|
| 1 | Check the battery for proper charge and condition. |
| 2 | Inspect the alternator belt for wear or damage. |
| 3 | Test the alternator output voltage with a multimeter. |
| 4 | Check the alternator diodes for any issues. |
| 5 | Inspect the wiring and connections for any damage or corrosion. |
| 6 | Check the voltage regulator for proper function. |
| 7 | Test the alternator under load to see how it performs. |
| 8 | Check for any other electrical issues that may be affecting the charging system. |
By following this checklist, you can diagnose most common alternator problems and determine whether the alternator needs to be repaired or replaced.
It’s important to note that some of these steps may require specialized tools or equipment, so it’s often best to have your car inspected by a qualified mechanic to properly diagnose and fix any issues with the alternator or charging system.
How To Repair Or Replace An Alternator
Repairing or replacing an alternator are jobs that are often best left to a mechanic or alternator specialist.
If you are going to tackle the job yourself then you should consult a suitable repair manual that is specific to your vehicle.
1. Repairing an Alternator
Repairing an alternator is not a DIY job and you should not attempt it at home unless you have experience with working on electrical devices such as transformers or inverters. Here is an overview of what the job entails:
- Remove the alternator from the vehicle: The first step in repairing an alternator is to remove it from the vehicle. This typically involves disconnecting the battery, removing the serpentine belt, and disconnecting the electrical connectors and mounting bolts that hold the alternator in place.
- Disassemble the alternator: Once the alternator is removed from the vehicle, it will need to be disassembled to access the internal components. This typically involves removing the cover and other parts to access the brushes, bearings, and other components.
- Replace the faulty components: Once the internal components are accessible, you can replace any faulty components, such as the brushes, bearings, or voltage regulator. You may need to solder or crimp connections to replace these components.
- Reassemble the alternator: Once the faulty components have been replaced, reassemble the alternator and test it to ensure it’s working properly.
2. Replacing an Alternator
Replacing an alternator can sometimes be a DIY task, if you are sure that the alternator is the cause of the fault and you are replacing the alternator with a part that is exactly the same as the old one.
You should consult a repair manual or video that outlines the steps specific to your vehicle before starting. Here is an overview of the general steps involved.
- Remove the old alternator: The first step in replacing an alternator is to remove the old one from the vehicle. This typically involves disconnecting the battery, removing the serpentine belt, and disconnecting the electrical connectors and mounting bolts that hold the alternator in place.
- Install the new alternator: Once the old alternator is removed, you can install the new one in its place. This typically involves mounting the new alternator in place, connecting the electrical connectors, and installing the serpentine belt.
- Test the new alternator: Once the new alternator is installed, it’s important to test it to ensure it’s working properly. This typically involves starting the engine and checking the voltage output with a multimeter.
- Reconnect the battery: Once the new alternator has been tested and is working properly, you can reconnect the battery and start the engine.
It’s important to note that repairing or replacing an alternator can be tricky, and it’s often best to have your car inspected by a qualified mechanic to properly diagnose and fix any issues with the alternator or charging system.
A mechanic will have the tools and expertise to properly repair or replace the alternator and ensure that it’s working properly before returning the vehicle to you.


How can I test my car’s alternator at home without using sophisticated equipment?
Could a failing alternator be the reason my car experiences intermittent power loss and dimming lights, especially when I’m running multiple electrical accessories simultaneously?